This is the final installment of our three-part cabinetmaking tutorial. Be sure to download the project plan that provides dimensional details, hardware sources and the cut list for this project.
Order of Operations
Even though a cut list is provided, it’s always a good idea to look at your projects and determine the best sequence to follow. On cabinets I build the case first, then cut and build the face frame, then derive the door dimensions. This is all shown in the video.
Making the Door
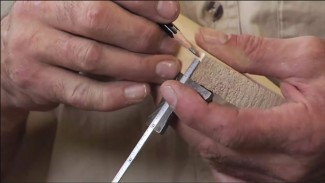
You can easily make the door on a router table using a tongue and groove router bit set. Follow the formula in the project plan to get your door part sizes. All cabinet door details are provided in the video.
Installing the door with its spring loaded hinges can be a little tricky. The video provides some great tricks to simplify this process.
Screw Cleats and Back
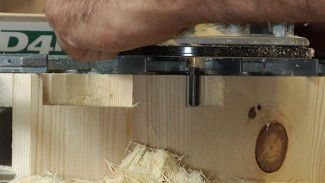
There are just a few details remaining to wrap up the cabinet project. Make and install screw cleats that will allow you to hang the cabinet on a wall. The ¼” thick back doesn’t provide enough strength on its own for this. You have to hang the cabinet using the cleats.
Cut the back to size so it easily fits inside the rabbets cut in the back of the case. It’s easiest if you don’t install the back until after the interior of the case has been completely finished. You can also finish the inside face of the back before installing it.
Make your adjustable shelf, and your cabinet is ready to be put to use.


These videos are great. George makes everything look easy. I was volunteered by my wife to build an entertainment center for good friends of ours, and although I’ve done a lot of home carpentry, finish carpentry is not generally my thing. I used these videos and plans as a basis for designing the entertainment center, and it came out great. They are very happy. (I also upgraded my tools significantly; I already had a pretty first-class router, but adding a router table takes it to a completely different level. The track saw, although you can’t use it for everything, makes wonderfully smooth and exactly dimensioned cuts).
nice but how do I get the material list and “plans” you keep referring to?
Hello,
Thank you for contacting us. If you look in the description section below the video, you will find the plan is located there.
Sincerely,
Sarah
Woodworkers Guild of America
Love it. I always think I need to reinforce glue joinery with brad nails. This video gives me a peace of mind that I can get away with gluing when you use the proper joinery. The Adaptive Cutting System Project Table is a very nice add when mainly using a track saw and skill saw. Now my question is: Normally would you use the table saw over these tools? These tools obviously produce a Great Wall cabinet. However; many of us still wonder if the track saw will replace the need to always have a table saw.
Hi Jason. Yes, I would use a table saw if I was in my shop. If I didn’t have a table saw, I wouldn’t hesitate to use a track saw. You can do a lot of great work with a track saw. For me, it’s just a bit slower than working with a table saw, but there are advantages as well when it comes to portability and cutting larger pieces that might be cumbersome on a table saw.
Paul
Woodworkers Guild of America
Beautiful presentation. Great tools, also.